Farpov Camera Setup Guide: System Settings & Shooting Schedule
2025-11-21 10:24:28
1. System Settings
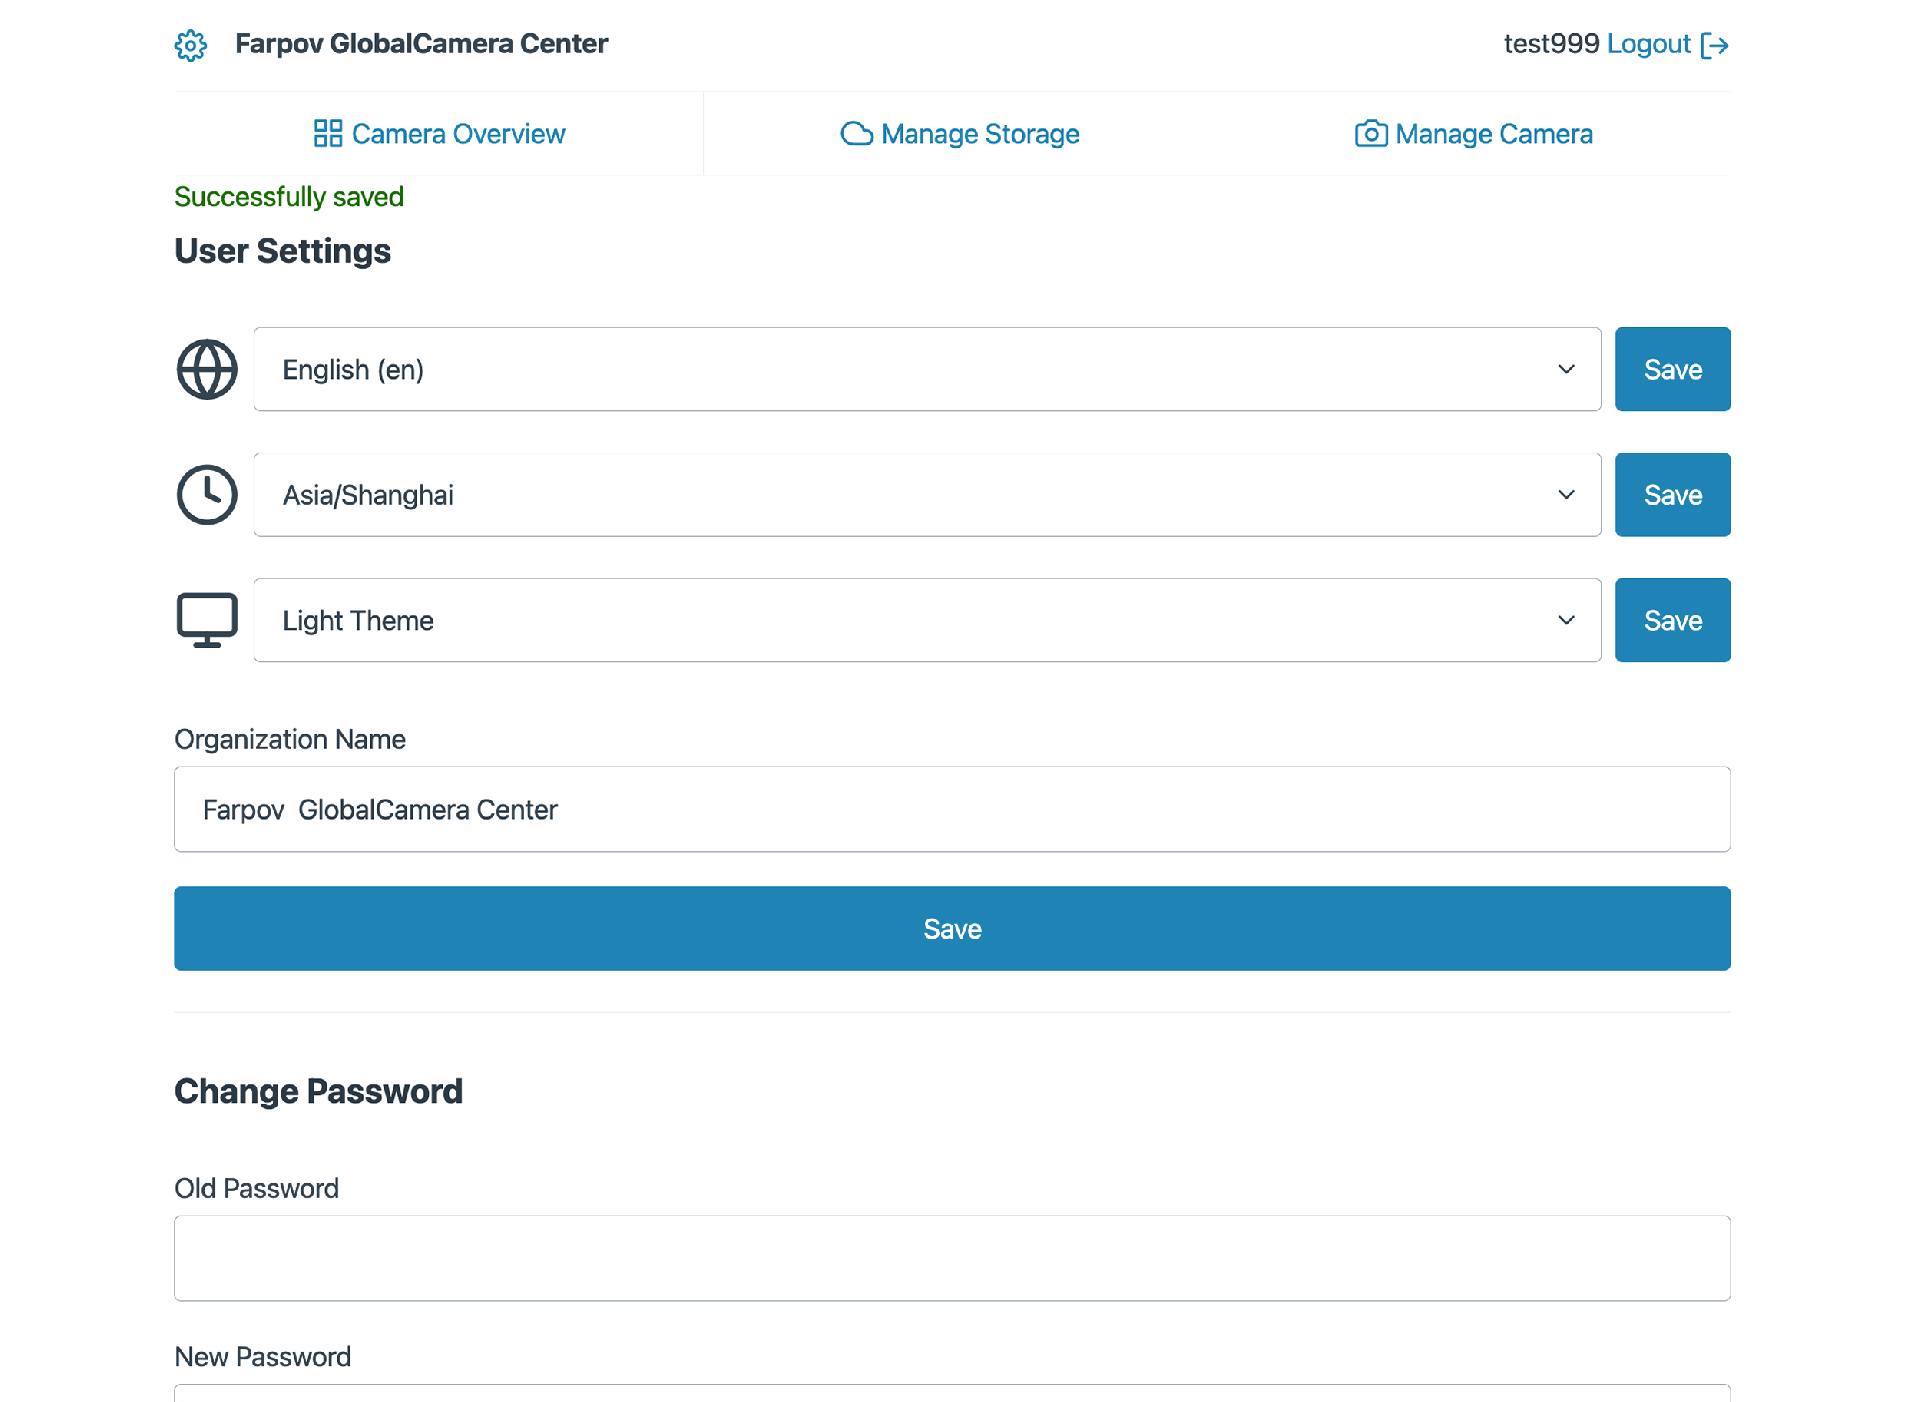
1.1 Time Zone Setting
Click the ⚙️ (Gear Icon) to enter system settings. Select your local time zone and click Save.Note: Correct time zone settings ensure that the timestamps on your images and system logs are accurate.
1.2 Organization Name
You can customize the "Organization Name" field. We recommend setting this to your company or project name for easier fleet management.
1.3 Login Password
You can change your login password at any time.Note: If you forget your password, please contact Farpov Support to reset it to the factory default.
2. Shooting Schedule & Camera Settings
Click on the Camera Status area to access detailed shooting parameters.
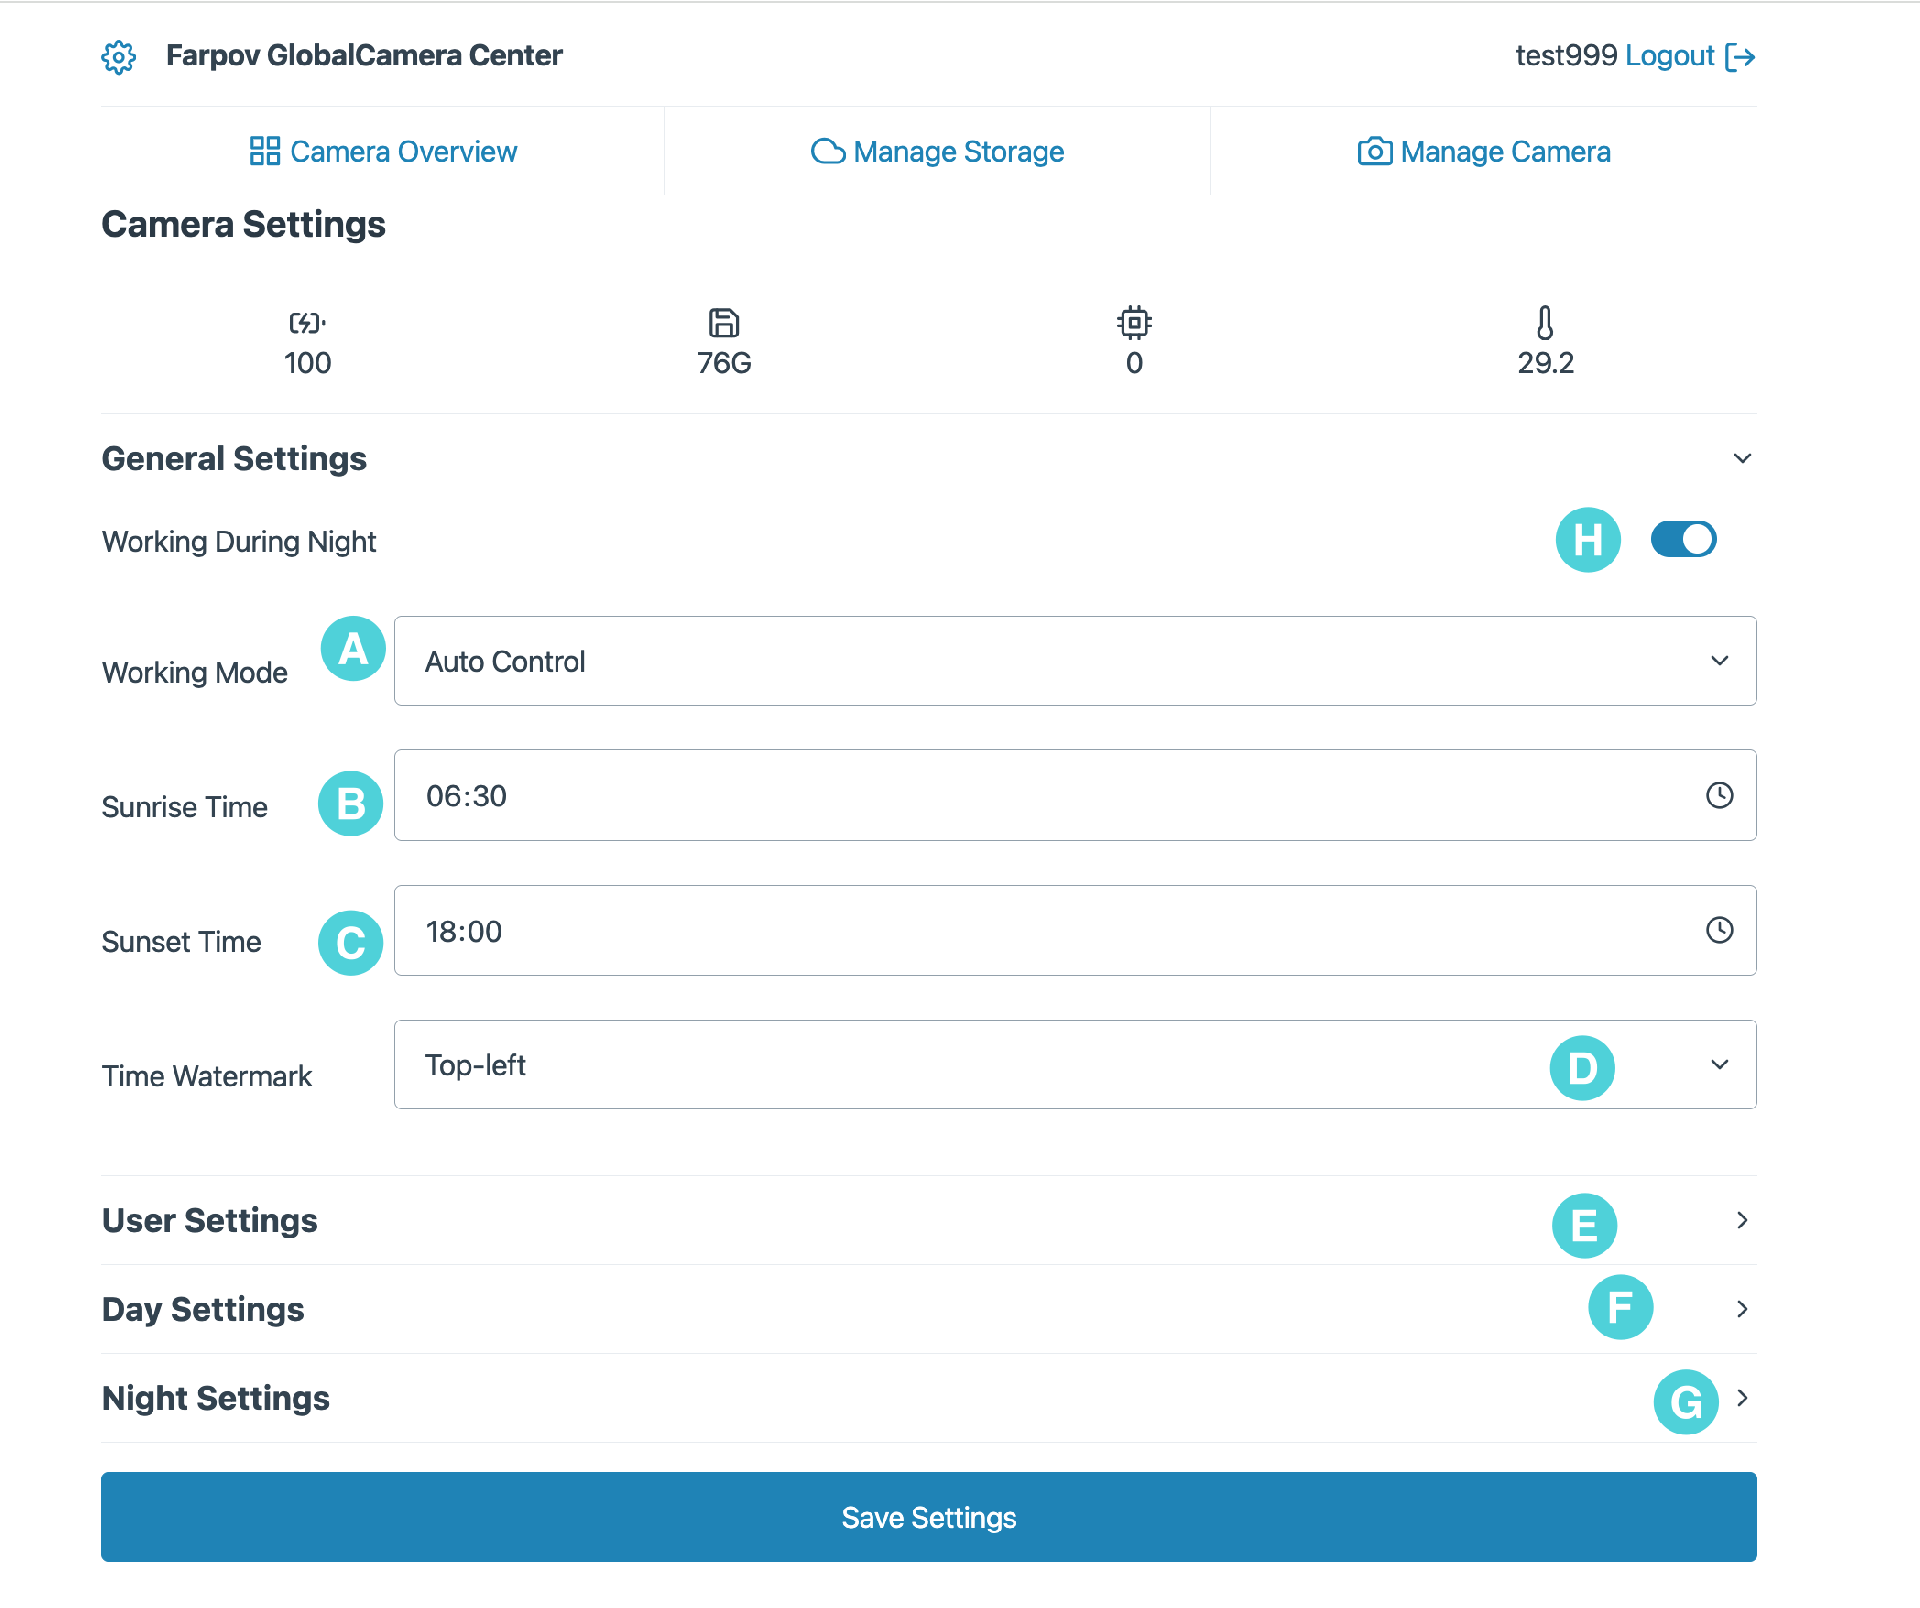
2.1 Time Watermark (Timestamp)You can choose to display a timestamp on your photos. There are 4 positions available (corners), or select "None" to keep the image clean.
2.2 Working Mode Settings
A: User Control (Manual Mode)When selected, the camera ignores sunrise/sunset times and strictly follows the parameters set in "User Settings".
B: Auto Control (Smart Mode) - RecommendedThe camera automatically switches settings based on local Sunrise Time and Sunset Time.
Why use Auto Control?
Better Night Quality: You can set a slower shutter speed and higher ISO in "Night Settings" to get bright, clear night shots.
Power Saving: If you don't need night shots, turn off "Working During Night". The camera will sleep after sunset.
Tip: If you only need minimal night monitoring, set the "Shooting Interval" in Night Settings to 60 minutes. This consumes almost no power.
Daytime: Controlled by "Day Settings" (Auto exposure recommended).
Nighttime: Controlled by "Night Settings" (Manual exposure recommended).
3. Important Notes & Best Practices
3.1 Shooting Interval Recommendation
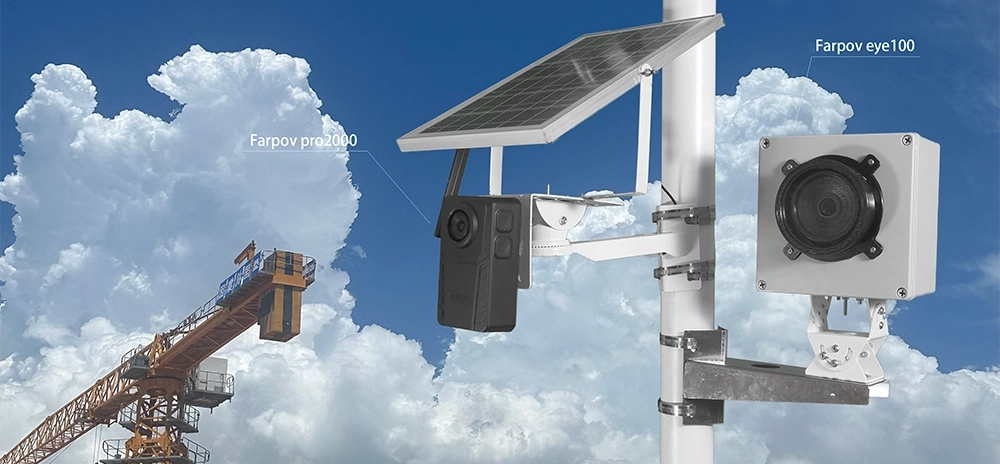
3.2 Weatherproof & Anti-Fogging Tips (Farpov Eye)The Farpov Eye features a fully sealed weatherproof housing.
Installation Tip: Always install the camera on a sunny, dry day. Ensure no moisture gets trapped inside the case.
Dealing with Fog: If installed during rain or high humidity, condensation may form on the glass when the sun heats the case.


 WeChat
 WhatsAPP